How to pay using Apple Pay: guide on how to setup Apple Pay

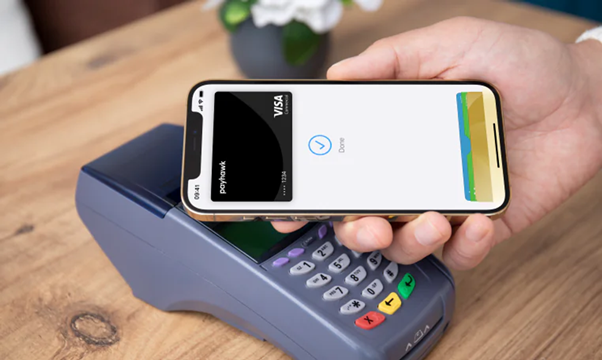
Apple Pay is a convenient and secure way to make payments using your iPhone, Apple Watch, iPad, or Mac. With a tap, you can pay for goods and services in stores, online, or apps. We’ll show you a quick guide on how to set up and activate Apple Pay on your devices.
How to Set Up and Use Apple Pay

- Check Device Compatibility for Apple Pay
First, ensure that your device supports Apple Pay. Most recent models of iPhone, Apple Watch, iPad, and Mac are compatible.
- How to Add a Card to the Apple Wallet
To start using Apple Pay, you need to add a credit or debit card to the Apple Wallet:
- Step 1 - Open the Wallet app on your iPhone.
- Step 2 - Tap the + icon to add a new card.
- Step 3 - Follow the on-screen instructions to enter your card details, or use your iPhone’s camera to capture them.
- Step 4 - Your bank or card issuer may require additional verification.
- How to Activate Apple Pay
Once your card is added and verified, you can start using Apple Pay:
- iPhone: Double-click the side button, authenticate with Face ID or Touch ID and hold your phone near the payment terminal.
- Apple Watch: Double-click the side button and hold your watch near the terminal.
- iPad or Mac: Use Apple Pay for online purchases by selecting it as your payment method during checkout and authenticating with Touch ID or Face ID.
- Manage Your Cards
You can manage your cards, set a default card, or remove a card at any time through the Wallet app. Go to Settings > Wallet & Apple Pay to customize your payment options.
With Apple Pay, you can leave your physical wallet at home. It’s a secure and efficient way to pay, whether you’re shopping in-store, online, or in apps. Plus, Apple Pay is available at iSTYLE stores, making your shopping experience even more convenient.
For more tips like this, follow us on Instagram and check out our latest blogs!

 United Arab Emirates
 Oman
Oman Lebanon
 Morocco
 Iraq
Iraq Hungary
 Romania
 Czech Republic
 Serbia
 Croatia
 Slovakia
 Bulgaria
 Slovenia
 Macedonia
 Spain (K-Tuin)

